


Mastering Watercolour Portraits and Exploring Printmaking Workshops at the Arts Hub
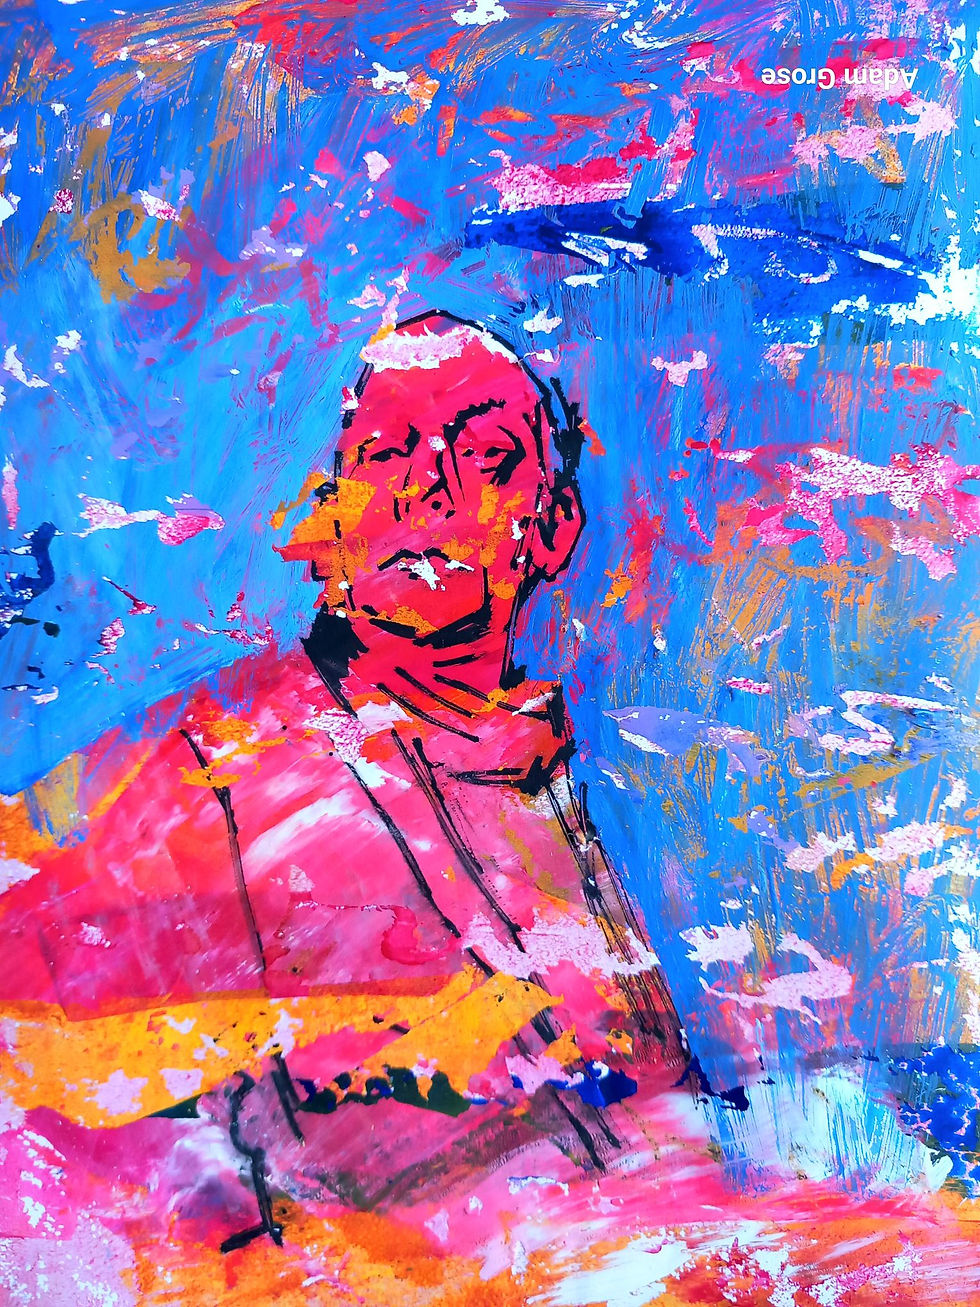
I created a watercolour portrait of fellow artist, Bob, offering a unique challenge and opportunity for me to learn more about using watercolour paint. Watercolour demands patience and control, especially when capturing the subtle expressions and personality of a subject.
This post shares some insights into the layering techniques that brought this portrait to life, without overwhelming detail. The text will offer a few tips to build confidence with this delicate medium.
I will also introduce an exciting chance to expand your artistic skills through our upcoming printmaking workshops at the Arts Hub featuring linocut, woodcut, and screen-printing sessions, starting after the May half-term break in June to July for six-weeks.

Understanding Watercolour Portraits: The Power of Layers
Watercolour is a transparent medium, which means each layer you apply affects the ones beneath it. This transparency is both a gift and a challenge. When painting a portrait, layering allows you to build subtle shadows, skin tones, and textures gradually. The key is to avoid overworking the paper or adding too many layers too quickly.
Start with a Light Sketch
You can begin with a gentle pencil sketch to map out the main features of your subject’s face. Keep lines light and minimal. The sketch acts as a guide rather than a detailed blueprint. It helps you place eyes, nose, mouth, and shadows without locking you into rigid shapes. In the image above I painted directly onto the paper with no previous sketch.
Apply the First Washes
Use a large brush and diluted paint to lay down the initial washes. These washes establish the overall skin tone and shadow areas. For example, a pale peach or light ochre can serve as the base skin colour. Let this layer dry completely before moving on.
Build Up Shadows and Details Gradually
Once the first wash is dry, add subsequent layers to deepen shadows and define facial features. Use a smaller brush and more concentrated pigment for areas like the eyes, lips, and hair. Remember to keep the edges soft where needed to maintain the gentle look watercolour is known for.
Avoid Overworking the Paper
One common mistake is to keep adding layers without allowing drying time or to scrub the paper. This can cause the paper to pill or the colours to become muddy. Patience is essential. Let each layer dry fully and step back to assess before continuing.
Use Water to Soften and Blend
Watercolour allows you to soften edges by applying clean water along the edges of a painted area. This technique helps blend shadows into the skin tone naturally. It also creates a sense of depth without harsh lines.
Personal Tips for Beginners
Choose quality paper: Use 300gsm cold-pressed watercolor paper. It holds layers well and prevents warping. If you use thinner paper and it warps, there is a technique that will flatten the paper once your painting is completed and fully dry
Limit your palette: Start with a few colours like burnt sienna, ultramarine blue, and a warm red. Mixing these can create a wide range of skin tones
Practice brush control: Experiment with different brush sizes and shapes to understand how they affect your strokes
Work in stages: Don’t rush. Let each layer dry before adding the next
Keep a water spray bottle handy: It helps keep your palette moist and can reactivate dried paint on the paper for blending
Use reference photos: If your subject isn’t available, work from clear high resolution photos to capture the details accurately.
Printmaking
Printmaking offers a different but equally rewarding way to express creativity. The Arts Hub is launching Block Two of its printmaking workshops in June. These sessions will cover linocut, woodcut, and screen-printing techniques, perfect for artists looking to expand their skills.
What to Expect from the Printmaking Workshops
Linocut
Linocut involves carving a design into a linoleum sheet, rolling ink over the surface, and pressing onto paper. It’s a tactile process that contrasts with the softness of watercolour. You’ll learn how to create bold, graphic images and experiment with texture. We will explore Jigsaw Linocut techniques.
Woodcut
Woodcut printing uses carved wooden blocks or plywood to produce prints. This traditional technique requires patience and precision. The workshop will guide you through carving tools, ink application, and printing methods. It’s ideal for artists who enjoy hands-on work and want to explore relief printing. We will also explore Jigsaw Woodcut techniques.
Screen-Printing
Screen-printing uses stencils and mesh screens to apply ink onto surfaces. This method allows for layering colours and creating vibrant designs. The workshop will cover stencil preparation, ink mixing, and printing on paper.
We will combine all these techniques into one mixed-media image.
Why Join These Workshops?
Expand your artistic toolkit: Learn new techniques that complement your painting skills
Work with experienced instructors: Get hands-on guidance and feedback
Connect with fellow artists: Share ideas and inspiration in a supportive environment
Create unique prints: Produce artworks that can be reproduced or used for cards, posters, and more.
How to Prepare for the Workshops
Bring your sketchbook and ideas for designs you want to explore
Wear old clothes or an apron, as printmaking can get messy
Be ready to experiment and try new tools and materials
Arrive with an open mind and willingness to learn.
Links for signing up:
Thursday Printmaking: https://www.creativeinnovationcentre.co.uk/workshops-classes/printmaking-classes-summer-term-23rd-april-9th-july-thursdays-9-30-12-30pm-half-term-28th-may/

Comments